

Exploring Glaze Chemistry: The Science Behind the Magic

Updated: Sep 16
Glaze chemistry explains what happens when the raw materials in a ceramic glaze are heated in the kiln. During firing, those materials melt and react with one another and with the clay body, creating the color, texture and surface of the finished pottery.
A glaze that looks one way before firing can emerge from the kiln looking completely different. The result depends on the glaze ingredients, clay body, application, heatwork and firing atmosphere.
Understanding the basic chemistry behind those changes helps potters make more informed choices, troubleshoot unexpected results and experiment more deliberately with glaze combinations.

What is Glaze Chemistry?
Ceramic glazes are mixtures of materials formulated to melt and form a glass-like surface during firing. Most glaze recipes balance three essential functions: a glass former, fluxes that help it melt at the desired firing range, and stabilizers that help control how the molten glaze behaves.
A glaze is composed of three primary components:
Silica (SiO₂) – The Glass Former
Silica provides the primary glass-forming material in a ceramic glaze. On its own, however, silica requires temperatures much higher than typical pottery firing temperatures to melt effectively.
Fluxes – The Melting Agents
Fluxes lower the temperature at which the glass-forming materials can melt and interact. Different fluxes influence characteristics including melting behavior, color response and surface development.
Alumina (Al₂O₃) – The Stabilizer
Alumina helps control the flow and viscosity of molten glaze. The balance of silica, fluxes and alumina helps determine whether a glaze develops as glossy, matte, fluid, stiff or somewhere in between.
Other ingredients, such as colorants and opacifiers, influence the glaze’s appearance, giving potters a broad spectrum of colors and textures to use while exploring glaze chemistry.
Colorants are metal oxides or stains added to glazes to produce different colors. Common examples include cobalt oxide for blue, iron oxide for brown or red, and copper carbonate for green. The final color can vary depending on the glaze composition and firing atmosphere.
Opacifiers are materials that make glazes more opaque by scattering light. They prevent glazes from being too transparent and can create solid, rich colors. Common opacifiers include tin oxide and zirconium silicate.
How Glazes React in the Kiln
During firing, glaze materials undergo a series of physical and chemical changes. Exactly what happens depends on the glaze recipe, clay body, firing schedule and kiln atmosphere.
Melting and glass formation: As heatwork increases, glaze materials begin reacting and melting, eventually forming a continuous glassy surface.
Crystal development: Some glazes develop crystals during firing and cooling. The size and type of crystals can influence whether a surface appears glossy, matte, opaque or variegated.
Color development: Metal oxides and stains can produce different colors depending on their concentration, the surrounding glaze chemistry and the firing atmosphere.
Oxidation and reduction: The amount of oxygen available during firing can change how some glaze and clay materials respond. This is why the same glaze can look substantially different in an electric oxidation firing and a gas reduction firing.
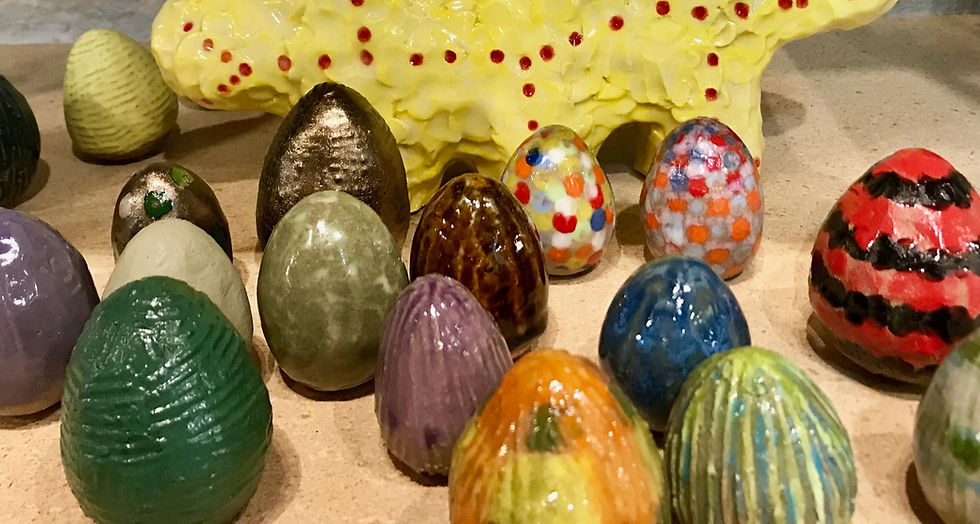
Tips for Experimenting with Glaze Combinations
Once potters understand some basic glaze chemistry, experimentation becomes much more useful. Rather than simply hoping that two glazes will work together, you can change one variable at a time and observe the result.
Layering Glazes: Apply one glaze over another to create depth and interaction. Some glazes pool and break in interesting ways when layered.
Varying Thickness: Thicker applications may yield more intense colors, while thinner layers can produce translucent effects.
Testing Small Batches: Always test new combinations on small test tiles before committing to a large piece.
Documenting Results: Keep detailed notes on your glaze recipes, firing schedules, and application techniques to replicate successful outcomes. Don't get lost when exploring glaze chemistry! You would hate to find an amazing combination that you forgot to document.

Glaze Chemistry at Cone 6
At Throw Clay LA, most student pottery is glaze fired to Cone 6. Working within a consistent firing range makes it possible to compare how different clay bodies, glaze applications and glaze combinations behave under similar firing conditions.
Glaze results are never determined by color alone. Clay body, glaze composition, application, heatwork and kiln atmosphere all contribute to the finished surface. Understanding those variables makes glaze experimentation more deliberate and the results more useful.
About Throw Clay LA
Whether you’re curious to try pottery for the first time or ready to develop your skills, Throw Clay LA offers one-time pottery experiences, six-week Build Skills courses, and six-week Refine & Explore courses in wheel throwing and handbuilding at our studio in Downtown Los Angeles.
We also offer pottery workshops and private pottery events for groups, while studio memberships provide experienced potters with dedicated space and time to pursue their own work, along with access to studio equipment, glazes, firing services and free weekly Member Clinics.
